Kate's Foray Into NRL Hunter Matches

Want to get better at mid and long-range rifle shooting? Or improve your ability to get into stable shooting positions with a bipod, tripod, or whatever natural structures surround you? How about finding targets (or critters), determining their range, and figuring out your elevation/windage adjustments as quickly as possible? Then NRL Hunter is the game to play. I can easily say that dipping my toes into it has already made me a better hunter at distances beyond my rifle’s zero. Plus, it is a hell of a lot of fun.
NRL Hunter is a rifle shooting game with a twist that requires you to do a lot more thinking on the clock: You don’t get to see the stage or targets until your 4 minute timer has started. All target locating, ranging, DOPE calculation, positioning, scrambling around, re-positioning, and shooting must be completed within that 4 minute window.
Don’t forget to dial. A very embarrassing mistake to make, which I would never do. Nope, not me.
My friend Dave introduced me to NRL Hunter and I immediately found this format to be more interesting than other rifle matches I had dabbled in. I shot my first match last January in the “Skills” division, which allows to you shoot a match at a lower price and with training wheels on – but you’re just competing for fun. Skills Division shooters do not have to shoot the stages blind (they can watch another shooter run it first), and they can receive coaching from RO’s or friends who have already shot the stage. Skills Division shooters also don’t need to meet the rifle weight or Power Factor requirements of the other divisions; they can just bring what they have. It’s a great low-pressure option for shooting your first match.

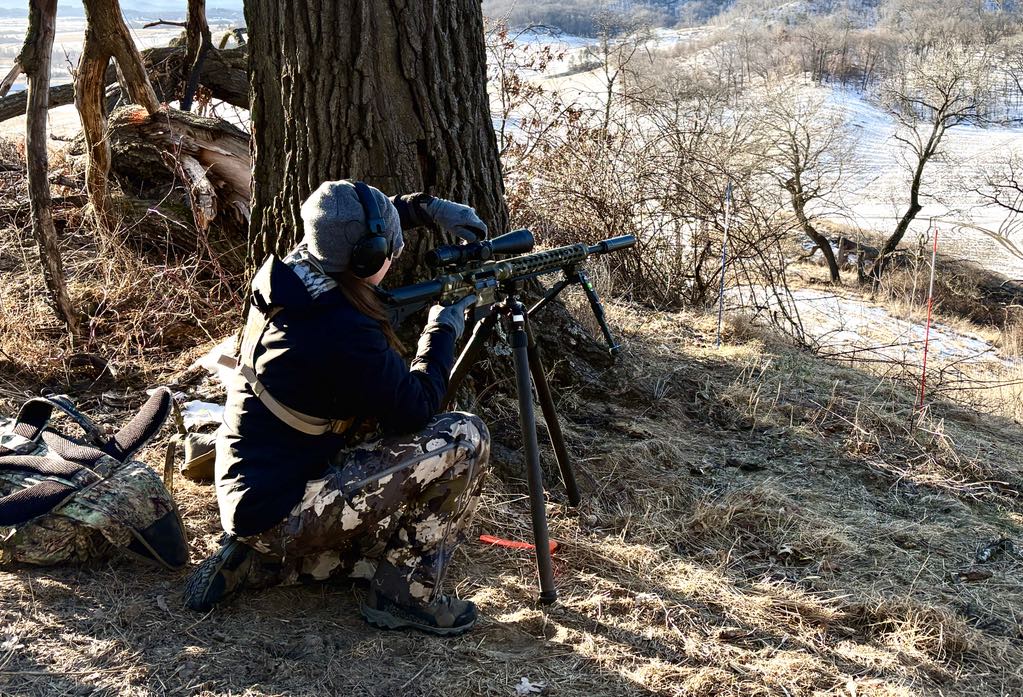
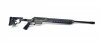
Rifles lined up in a staging area. My JP LRI-20 “gas gun” may have been an oddball, but it received many compliments.
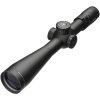
I was pretty hooked after my first experience, so when a match was announced nearby in Sparta Wisconsin, I was all-in. I signed up for the “Open Heavy” division, which is for rifle setups (including bipod) between 12 and 16lbs. My JP LRI-20 in 6.5 Creedmoor fit the bill nicely, with a handful of ounces to spare before hitting the 16lb limit. It sports a HUXWRX suppressor, and a Leupold Mark 5HD 5-25x scope. I definitely wasn’t the only competitor with that scope; the Mark 5HD gets you a lot of scope for relatively little weight compared to many other options in that magnification range. I was, however, the only weirdo shooting a semiautomatic. My LRI-20 isn’t exactly what I’d take hunting in most cases, but it’s a tack-driver, and it’s what I already had on-hand. NRL Hunter also has an “Open Light” division for rifle setups under 12lbs, and a “Factory” division, for unmodified mass-produced rifles from an approved list of manufacturers. Factory division rifles must also be under 12lbs when fully equipped – meaning their weight with scope, suppressor, bipod, and anything else that might be attached to the rifle when a stage begins.
A wide variety of actions, stocks, scopes, and muzzle devices were present. And one goof shooting a gas gun.
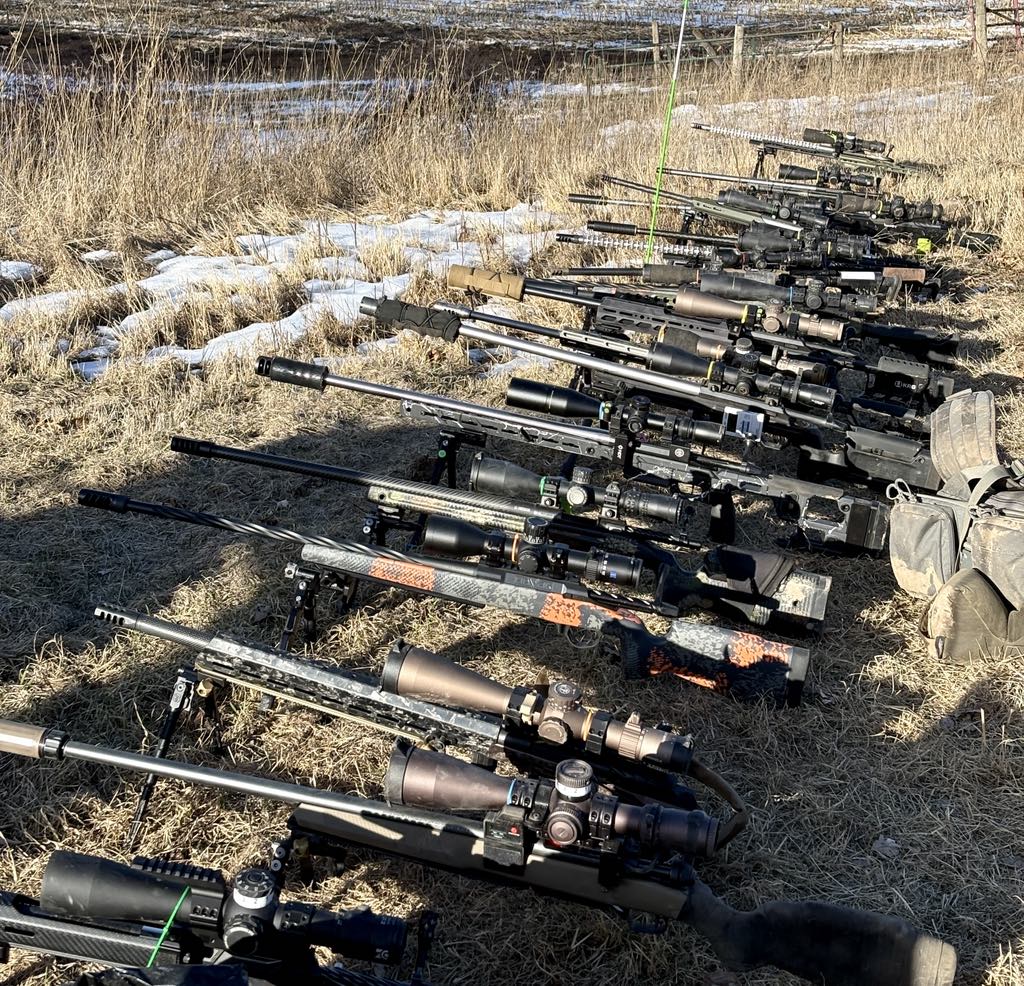
This Wisconsin match was my first major 2-day match shooting with the full ruleset – blind stages, no assistance or feedback. Shooters are kept in a “holding area” out of sight of the stage’s actual shooting area. A sign in the holding area will indicate the type of targets for the stage, the number of targets, the number of positions, and the order they must be engaged in – either left to right, or near to far. Every stage in NRL Hunter consists of 4 things to shoot at: either 1 target shot from 4 positions, 2 targets shot from 2 positions, or 4 targets shot from a single position. A target hit with your first shot from a position will score 2 points, and a second round hit will score 1 point – if you miss twice on a target, you’re done with that one, and must move on to the next target or next position. Since there are 4 first-round impact opportunities, every stage has a maximum of 8 possible points.
Stage 1 of the match consisted of 2 targets which must be shot from left to right, from different 2 positions.
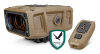
At the beginning of each stage, once the timer starts, you high-tail it from the holding area (or mosey, if that’s your style) to the shooting area. A stake or flag on the ground indicates a spot where you can see the stage’s initial target, so it’s wise to plop your tripod down right on top of that marker and pull out your binos to start scanning like mad for the stage’s targets. Two flags or markers in front of the sighting stake let you know the maximum area to search for targets – the targets for that stage won’t be outside of that viewing arc.

With my tripod right on top of the sighting stake, I’m scanning through my binos. The orange and blue marker posts in front of me indicate the field of view for finding the targets.
You might think that the restricted angle would make it easy to locate the targets. However, you have no idea how far away they are – they could be 100 yards from you, or 1000. In a rolling, tree-filled landscape, like the Driftless region of Wisconsin, there’s a lot of area for a gray steel target to be hanging out. There were at least 2 targets in the match that I never managed to locate. To make things a little easier, an 18”x24” placard with the stage number will be in the field within about 20’ of the first target for the stage. Once you locate that placard, it’s usually (but not always) easy to at least find the first target. The next target might be right next to the first… or it might be 800 yards up a ridgeline. Finding targets quickly is a major challenge in the game, especially for stages featuring 4 of them.
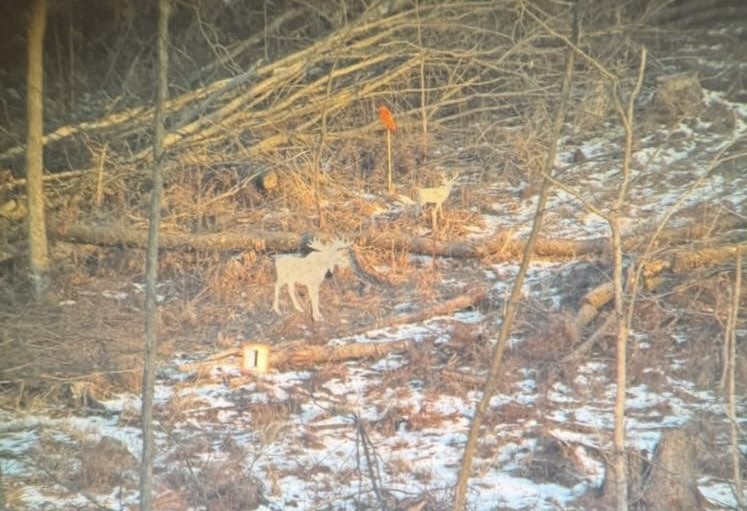
Stage 1’s moose and deer targets as viewed from a spotting device, with the stage 1 placard nearby. These ones were a doozy, at 950+ yards. The orange crow was a bonus target for the match, outside of the official scoring. Courtesy of Geno Christman at Carnival Ballistics.
After locating the targets, you must set up to shoot within arms-length of the designated shooting positions and take your shots. These positions might be marked with a flag or stake on the ground, or spray paint on a rock or tree trunk. Hopefully by this point, you’ve also figured out the range on the targets, and the elevation/wind adjustments or holds you need to use. The easiest way to accomplish this, by far, is to use a pair of binoculars with a built-in laser rangefinder and ballistics solver. These incredibly slick devices allow you to locate a target, hit a button, and be quickly fed its range, as well as your elevation adjustment in MILs or MOA (and in some cases, your wind hold). This is a huge timesaver compared to using dedicated binos and a separate handheld rangefinder.

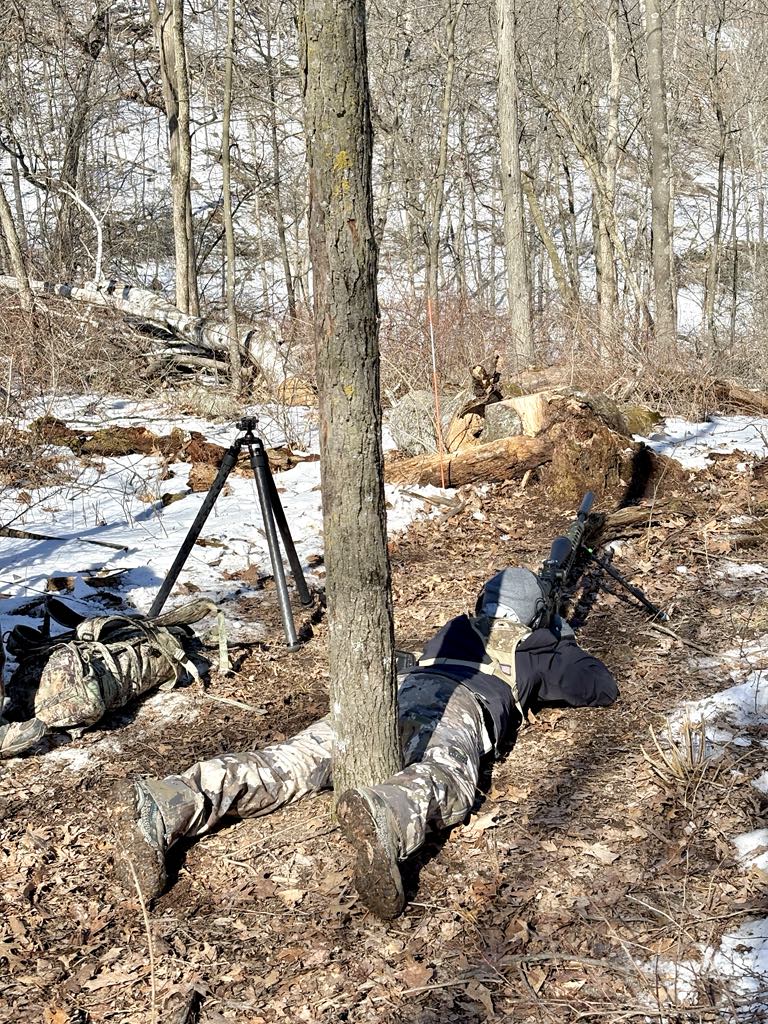
Stage 4 consisted of a single deer target positioned in the clearing near the top of the photo, shot from 4 different positions, 3 of which were off a fallen tree.
After using a borrowed pair of Sig binos with built-in ballistics at my first match, I’ve been kicking myself for not using a pair on western hunts. Particularly because I’ve struggled to re-find animals at dusk through dinky rangefinder glass after putting down my binos. In addition, I find it easier to keep my rangefinder reticle steady and get an accurate range with binos versus a one-handed rangefinder. But perhaps most importantly, built-in ballistics eliminate the need to look up your elevation/windage adjustments on a phone app, DOPE card, or Kestrel. Instead, you can upload your rifle’s ballistics profile to these binos and have it spit out accurate adjustments based on your rifle’s data, ammo characteristics, the range it just lased, and the atmospheric conditions that it’s picking up through its sensors. Why had I fumbled with binos, rangefinder, and a phone app for years when I could’ve had it all wrapped up in one fast package?

Excellent shooter and fellow Minnesotan Varick Beise on-deck at stage 12, sporting a JP MR-19 and Vortex Fury range-finding binos.
I quickly picked up a pair of Revic Acura BLR10b ballistic range-finding binoculars, which I took out to Arizona and used on a successful javelina hunt. The Revics output a ballistic solution very quickly, which my impatient self greatly appreciates. Other good options include the Swarovski EL Range, Vortex Fury, Sig Kilo 10k Gen 2, Leica Geovid Pro AB+, and the Vectronix Vector X. I have a feeling I’ll end up owning more than one of them, as they all have their own pros and cons (and cost considerations). I rounded off my gear buying frenzy with a Really Right Stuff TVC-22i tripod with inverted legs and RRS’s excellent Anvil-30 ball head/ARCA mount. I borrowed a MDT Douple Pull Ckye Bipod from my friend Dave, because I couldn’t overcome decision paralysis when it came to bipods. All of this and everything else that you’re using that day must be carried with you when you start each stage; it’s best to smother that impulse to overpack.
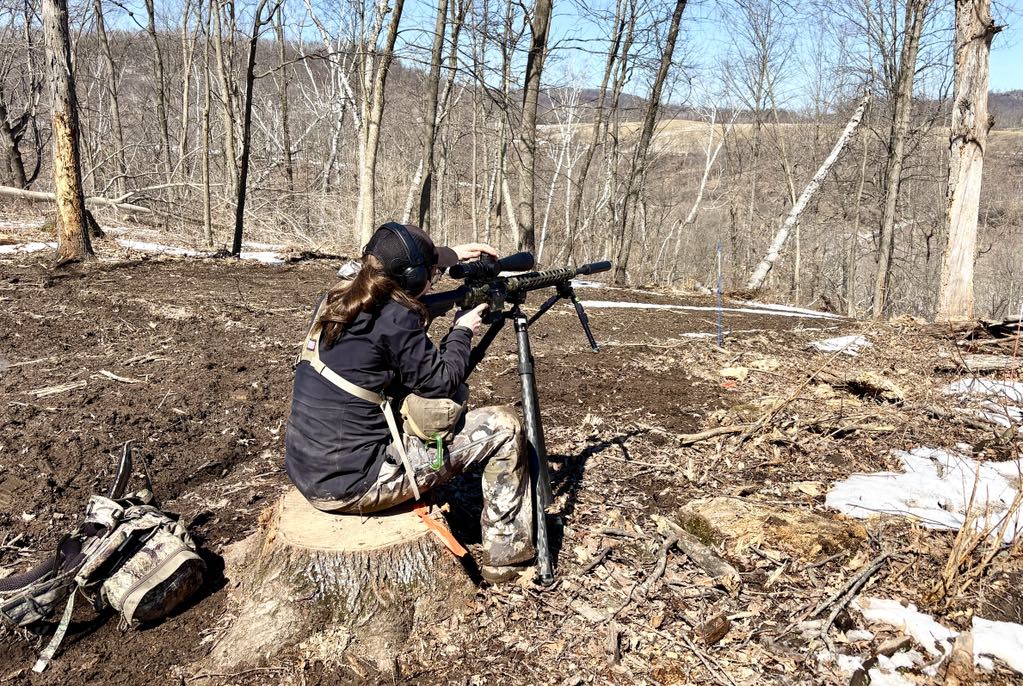
First shooting position in this stage was a stump. Seemed like a decent place to dump my pack, plop down, and utilize the RRS tripod.
First order of business for myself and Dave at the Wisconsin match was to check-in Friday afternoon before the match kicked off, demonstrate that our rifles passed their division’s weight limit, and get our ammo chronographed. Factory ammo of 6.5mm caliber or greater like the Hornady 140gr ELD-M’s I was shooting automatically passes the game’s minimum “Power Factor” requirement, but Power Factor (velocity times bullet weight) is also used as a tiebreaker. Second order of business was to meet another friend, Lucas, who quickly advised us on the best food joint in town: Matsumoto Ramen House. If you’re ever passing through Sparta Wisconsin, don’t miss it. With our bellies full of noodles and broth, we headed back to our Airbnb, admiring the hordes of whitetail deer that were suddenly thicker than ticks in spring all over the landscape. I did my usual manic last-minute dryfiring, hoping to purge out any mental demons that might be lurking (unfortunately that didn’t work). Dryfire is a fantastic tool to work on positioning and other skills at home; I recommend a handy scope attachment called a DST Precision DFAT which allows you to focus your scope on very little targets on 8.5”x11” sheets placed 11-15’ from your rifle.
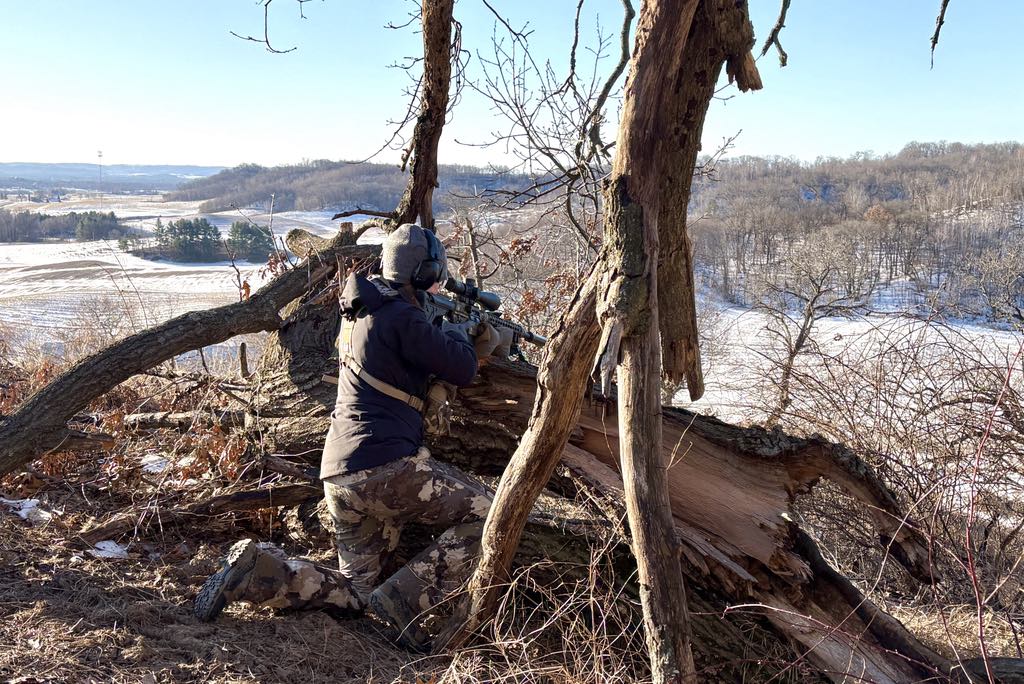
Stage 3’s 2nd position was a fun one off a split trunk. The first target was downhill.
The match kicked off the next morning with a 7am shooters meeting in a pole barn, followed by a brisk march up to a ridge where most of the stages took place. It was a nice way to get the blood flowing and keep warm in the 20-degree morning temps. My squad started off on stage 3, where I quickly lost my mind on the clock and couldn’t locate the 2nd of 2 targets. I managed to keep my head on otherwise though and cut my losses by making sure I got first round hits on the target that I did locate. The next two stages didn’t go so great either, but things started connecting for me after that point. Mental errors were my biggest problem, so I loosened up, relaxed, and angrily kept telling myself to never forget to dial my elevation again.
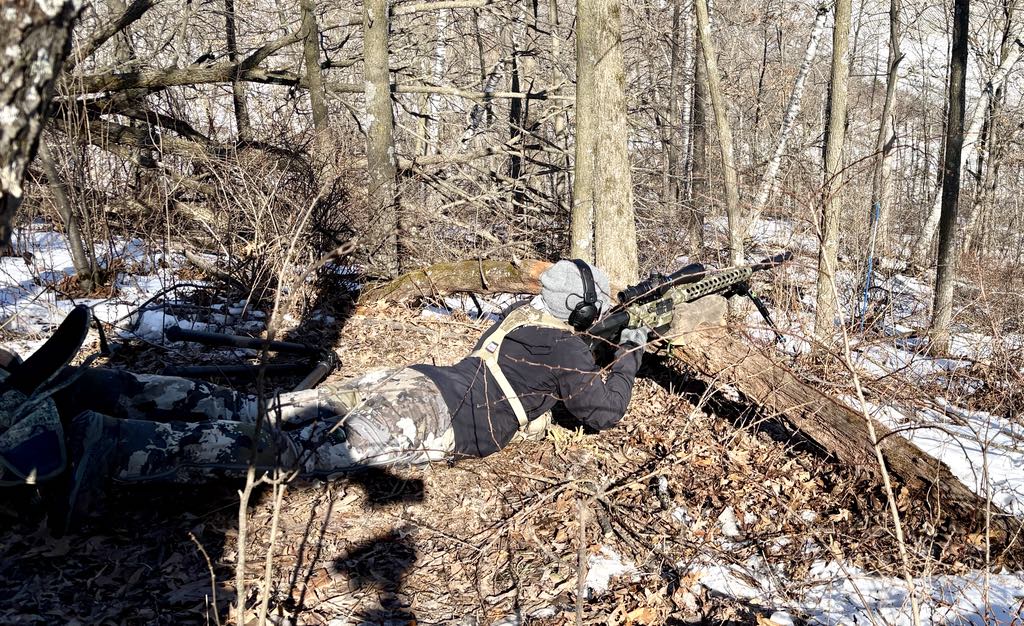
My back and neck reminded me of this stage for the next several days.
As the day warmed up, so did the ground, turning into a lovely wet sludge. Suddenly, seated positions became very preferable to going fully prone. Maybe I’m just one with the mud, because I started scoring much better – eventually “cleaning” 5 of the 15 stages by getting all first-round impacts for 8 points.
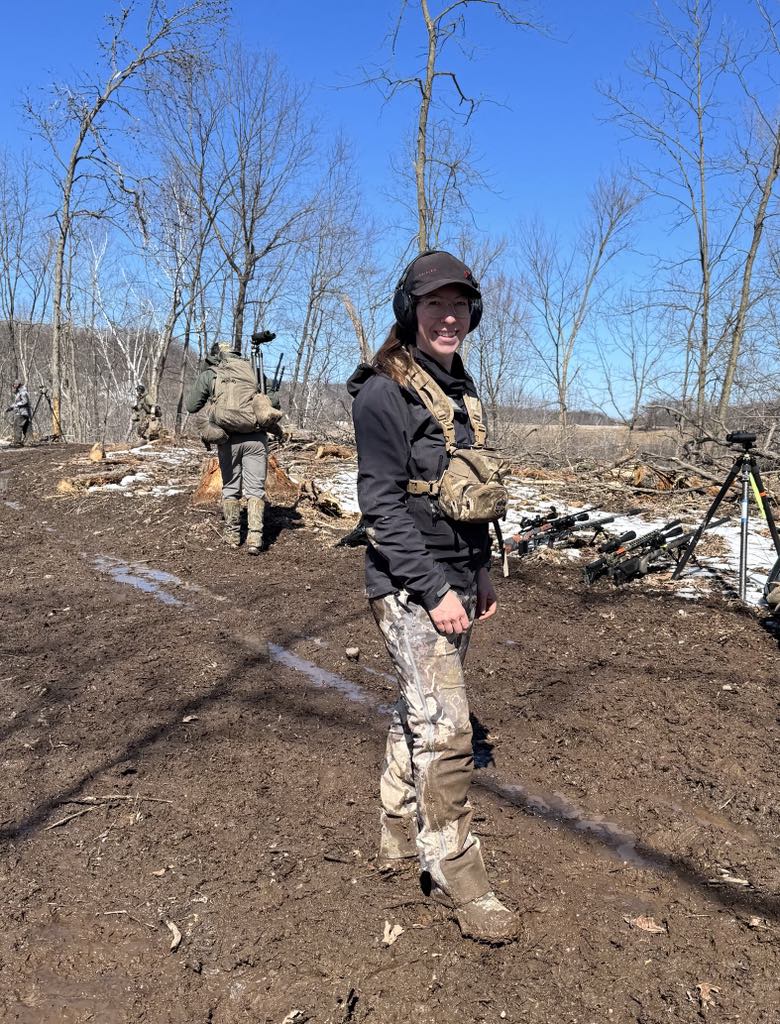
Big smiles, because sunshine and mud were very preferable to rain.
Targets throughout the match ranged from about 160 yards to just under 1000, although the majority were probably between 400 and 600 yards. This was a little farther than I had anticipated, but luckily it was an almost windless day, which made things a tad easier. Even with the lack of wind, I was very pleasantly surprised when I kept managing to hit the targets at 800 yards and beyond. Guess those ballistic solvers really do work when you feed them the right data and remember to dial your scope! It was extremely satisfying to hit both 950+ yard targets on stage 1 from both shooting positions, with 2 first round impacts and 2 second round hits.
Am I utilizing the terrain in some clever way, or just oblivious? Answer: oblivious.
With the forecast for Sunday morning looking like a miserable cold rainstorm, the match organizers pushed for everyone to finish shooting all the stages on Saturday. Myself and everyone I spoke to were extremely grateful for this, as no one was looking forward to climbing up a muddy hill in 35-degree rain. After we wrapped up shooting, we did our best to de-mud ourselves at the Airbnb, then hit up another local recommendation – a restaurant called Club Oasis. I hadn’t experienced a real Wisconsin Supper Club before, so this was a real treat.
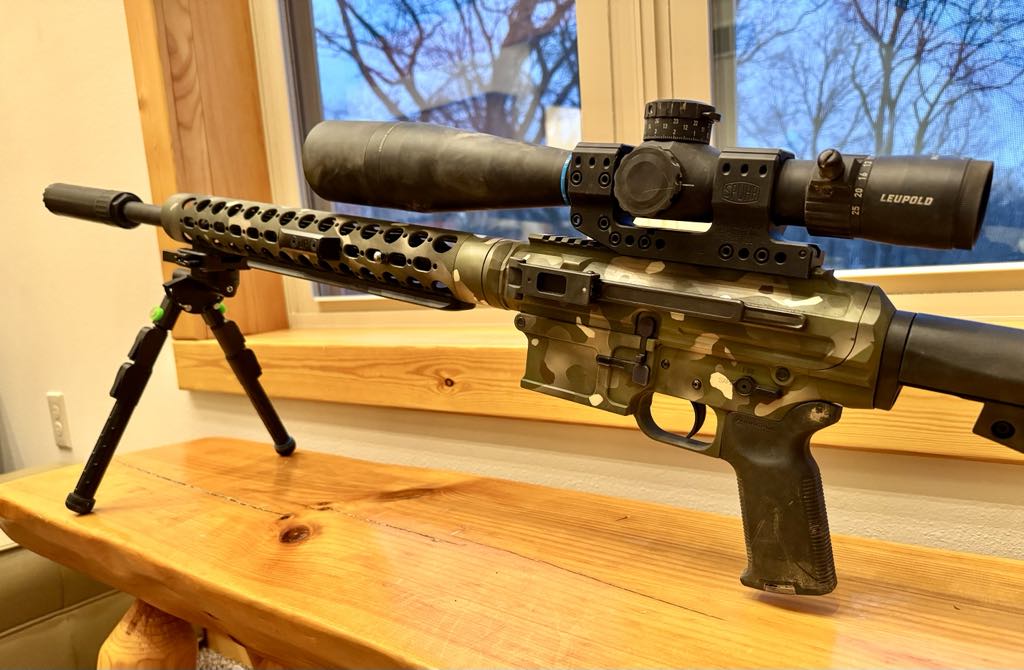
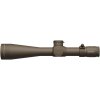
Maybe if I had a camo scope, all the dirt on it wouldn’t be so obvious.
The next morning, it was back to the match pole barn for breakfast and awards. I tied for 7th (ok, I lost the power factor tiebreaker, so I got 8th) out of 24 shooters in the Open Heavy division, and got 74% of the points of the match winner, which I was extremely happy with.
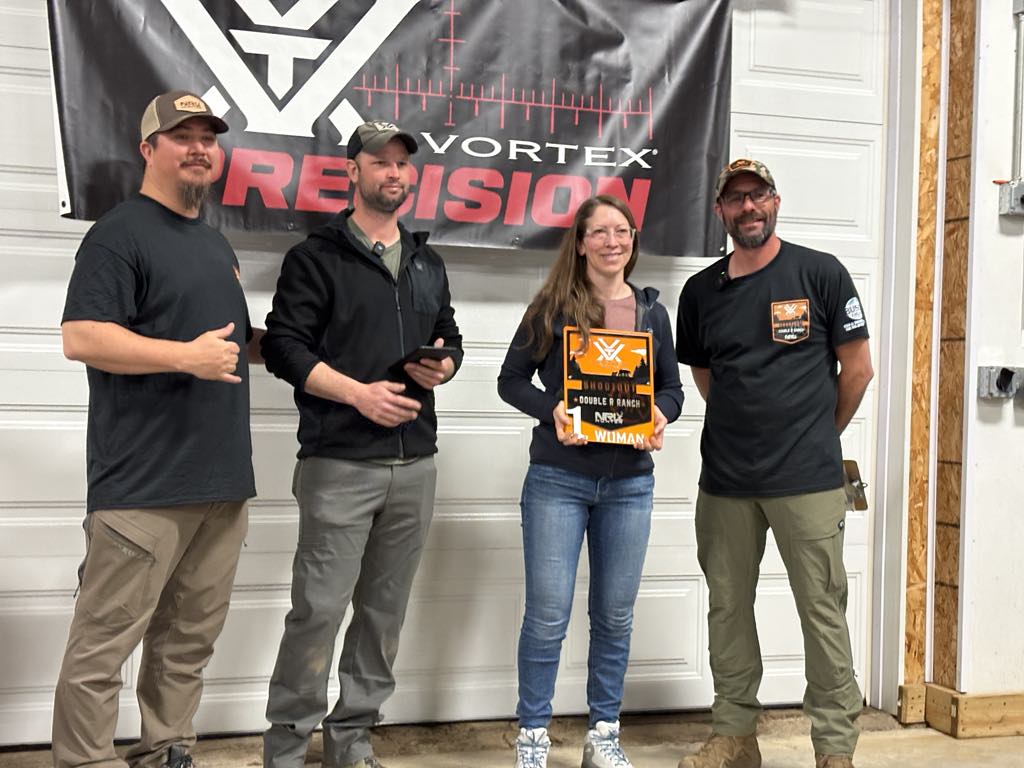
Dave managed an impressive top-5 finish in Open Heavy, and Lucas pulled in 2nd in the Skills division. Dave was also one of the few people to hit the bonus 967 yard crow target on stage 1, resulting in him winning a Vortex Impact 4000 rifle-mounted laser rangefinder/ballistic solver.

If any of this game sounds intriguing to you, I strongly recommend signing up for a match and giving it a go. The Skills division is a very newbie-friendly way to get started – you’ll learn a lot and get plenty of useful feedback (especially if you ask for it). A 6.5 Creedmoor rifle is preferable, but if you have a rifle that is .30 caliber or smaller and your rounds are less than 3275fps, you can use it. A rangefinder and a backpack are necessary; a bipod, shooting bag, and tripod are also very useful (but not absolutely required).
A list of this year’s matches can be found here:
One day “NRL Hunter Games” Matches (less formal)
Products mentioned in article


, 9” to 18.5” Height (5\" when using cant), 170 degrees of cant, 360 degrees of pan capability, 20oz")